Wednesday, February 14, 2018

Fresh Spring Floral Gratitude

Hello and Happy Valentine's Day! It's Janet here with another video tutorial. This time I'm showing off one of the largest dies in the new Spring 2018 Release called Fresh Spring Floral. Others on the DT have featured this gorgeous floral die but this is my twist on it.
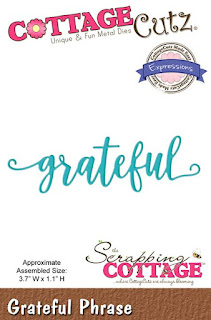
My thank you card includes the Expressions Plus Grateful die at the bottom. Inside, I used the Thanks Expressions die. All three dies are available in the store.

This is a pretty simple A2 card base in black card stock. The black background makes the pastel colors in the wreath pop. The white frame was created with an embossing pen and white embossing powder. The raised glossy frame gives it an almost nostalgic look, like the old fashioned photo albums with white writing. The Grateful Expressions Plus sentiment is cut from textured red foil card stock to add a little glamour without competing with the wreath.

I hope you'll take a few minutes to watch the card construction tutorial. As always, just click on the YouTube thumbnail below. If you have trouble using the thumbnail, you can also follow this link directly: Fresh Floral Gratitude Video Tutorial


That's it from me today. Thanks for visiting us!

- Janet

Dies Used In This Project:


Monday, February 12, 2018

Let's Color Eggs!

Hi, Lois here with another card for Easter.  As a kid, I'm sure we all loved to color Easter eggs.  I know I did.  Using one of the new Easter/spring dies from CottageCutz, I made a card reminiscent of that fun experience.  The CottageCutz die I used on my card is Egg Painting Bunny.


I wanted to make my egg-painting bunny the star of the show, so I made a relatively monochromatic background for him, using various purple papers.

To start my card, I die-cut the pieces from white cardstock.


Leaving the pieces on my sticky foam mat, I colored them using my favorite coloring medium -- my Copic markers -- using the packaging as a guide.   After I colored the pieces, I constructed the bunny and his paint can.


I then cut my cardstock and patterned paper:

Purple card base - 8 1/2" x 5 1/2"
Pale violet patterned paper - 4" x 5 1/4"
Die cut purple cardstock with largest Nested Stitched Scallop Rectangle Die
Die cut pale violet cardstock with largest Nested Stitched Scallop Rectangle Die, trimmed at the stitch lines


Constructing my card was simple.


I added some small foam pop dots to the back of the bunny and the eggs and adhered them to my card.


I then stamped the sentiment, and I was finished.


Be sure to check out the CottageCutz store because these Easter/spring dies (as well as some cute stitched dies) are currently 25% off.

CottageCutz dies used on my card are:

http://www.scrappingcottage.com/cottagecutzeggpaintingbunny.aspx


http://www.scrappingcottage.com/cottagecutznestedstitchedscalloprectangleset.aspx


Sunday, February 11, 2018

Crazy In Love


Hi everyone!

This is Anja again. Valentine's day is in a few days. I have one more Valentine's card for you today, before I move on Easter and Spring themed cards. This time I used another holiday die. I like dies that can be used on different occasions. This car die is definitely one of those.


For this card I used:
- Cottage Cutz dies (Holiday Car, Phrase Love),
- Distress Inks (Black Soot, Fired Brick),
- craft paper for card base (two 15x15 cm squares),
- red, black and white card stock for die cuts,
- Versafine Onyx black ink pad,
- Versamark embossing ink pad,
- clear embossing powder,
- alphabet stamps,
- background stencil,
- silver pigment ink,
- white pigment ink,
- hole punch,
- split pin,
- blue and yellow brush pen,
- scissors,
- Glossy accents,
- heat gun,
- paper glue.

First I cut and colored the car. This time I used colored card stock and just added a bit of Distress Ink around the edges. I used silver pigment ink for metal parts of the car. I colored the headlights with brush pens.


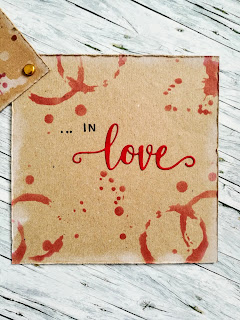
I cut two rectangles from craft card stock and colored them, using stencil and white and red ink.


First I used white pigment ink and then added the red. I colored the inside i the same way.


Then I stamped the sentiment, using alphabet stamps and black ink.


I decided to distress the edge of the paper. I used the scissors to do it.


Afterward I decided I wanted the glass marks to look more realistic. That's why I used embossing ink and powder to make them look "wet". I did this only on the front side of the card.


I made holes on the both squares and put in a split pin for the card to slide.


Then I just glued the car and the love phrase on the front and in the inside of the card. I used Glossy Accents for the windows and the lights of the car.


This all from me for today. Have a nice Sunday and don't forget to check the store for the latest dies.

Anja Z.

I used:


Saturday, February 10, 2018

Stitched HB2U Birthday

Hello Scrapping Cottage friends! Thanks for taking the time to stop and visit today. It's Mary Marsh here bringing you the Saturday edition of the Blog. Hope you are staying warm during this cold snap that is currently with us.

Here is some good news that comes in the middle of winter! We have a new release of dies. There is a In-Stitches release with 12 new dies and a Spring release with 21 new designs. And, some other good news is that for a limited time, you can get the new dies at 25% off. Just in time to create your Easter or Springs cards.

Today, I am using the new Stitched Alphabet, Stitched Owl and Bird and the Stitched Sun, Clouds and Umbrella dies to create a birthday card for a little girl.  So let's get started with some details on how I created my card.

Step 1: Since I was creating an outdoor scene, I started by sponging my cardstock with distress inks. I used tumbled glass and mowed green lawn on distress ink cardstock.
I sprayed the panel with a mister to move the ink around a bit and get a more muted look.
I used my heat tool to speed up the drying process. I like the water spots and how the ink splattered a bit in the comer of the card.
Step 2: I started cutting my images.
Bird: cucumber crush cardstock for the body and pacific point cardstock for the wing.
Cloud: I cut it from the sponged background
Sun: I cut this out intending to use it in the corner of my card. When I started assembly, I forgot I had it and put the bird image up to high on the panel (LOL)!!!
Tree Branch: cut in brown sugar cardstock and the leaves are cut in garden green cardstock.
HB2U: cut in cucumber crush cardstock.. I just love the look of the stitched letters.
 
Step 3: Now that all the images are cut, I am ready to start card assembly. I think this little stitched bird is just to cute. She could be used for a variety of occasions, but today I am using for a birthday card.
Step 4: I finished off my card by stamping the sentiment directly on the cloud. I thought it added interest and didn't interfere with my sponged background. Used my MISTI for placement and also to insure I would get a good stamped image.
I wanted to add some enamel dots but I didn't have any in the cucumber color. So I cut some small circles and used those on the card. I secured the image panel to the card base to complete this card.
Cucumber Card Base: 4 1/4" x 5 1/2"
Image Panel: 4 1/8" x 5 3/8"
Well, that's it for me for this post. I hope I have given you an idea for the new stitched dies. Here is a link to another card I created in different colors using these same dies. See you next Saturday.
Dies I used to create card:
http://www.scrappingcottage.com/cottagecutzstitchedalphabet.aspx

http://www.scrappingcottage.com/cottagecutzstitchednumbers.aspx

http://www.scrappingcottage.com/cottagecutzstitchedowlandbird.aspx

http://www.scrappingcottage.com/cottagecutzstitchedsuncloudsandumbrella.aspx
http://www.scrappingcottage.com/cottagecutzstitchedhoneybees.aspx