Wednesday, December 06, 2017

Get To Know Janet Axtman

Hello Scrapping Cottage friends! Thanks for taking the time to stop and visit with us. We started a new feature several weeks ago that we are continuing with today on the Blog.  We would like to give you a closer look at our designers.  It's  a "get to know the design team"  and today we are featuring Janet Axtman.

I'm Janet Axtman and my creative "handle" is SugarShine Designs. For me, crafting is sweet like sugar and pretty much all my work has some sort of shine incorporated in it. Thus, SugarShine Designs was born.
 
Heat embossing, glitter and Wink of Stella are my best friends for adding shiny elements to my projects. My style is definitely cute and casual. I create formal projects occasionally but I never have as much fun as when I choose whimsical elements!  

I live in the great state of North Carolina and have been married to my very supportive and patient husband Steve for 29 years. We have a wonderful son who is in 7th grade this year.
 
I've been crafting for as long as I can remember and my first projects were in crochet and embroidery. My grandmas were farm ladies who introduced me to these crafts and sewing. Over the years, I have dabbled in several different mediums but my favorites today are knitting, scrapbooking, and card making.
 
Scrapbooking was a latecomer and entered my life when my son was born and I wanted to make scrapbooks as keepsakes. That took off and for years it was my primary passion. Today, my focus has changed to card making. I so enjoy designing and creating on a smaller "canvas." I give most of my work away to family and friends and I am so surprised and pleased when I discover cards I had forgotten about are still being kept by some of my recipients. It's really heartwarming to know that a small act of kindness is valued as something special. 

Over time, card making techniques have become so diverse. I love that I can experiment and use so many mediums such as water color, pencils, markers, stamps, pastes, foiling, embossing and many others.
 
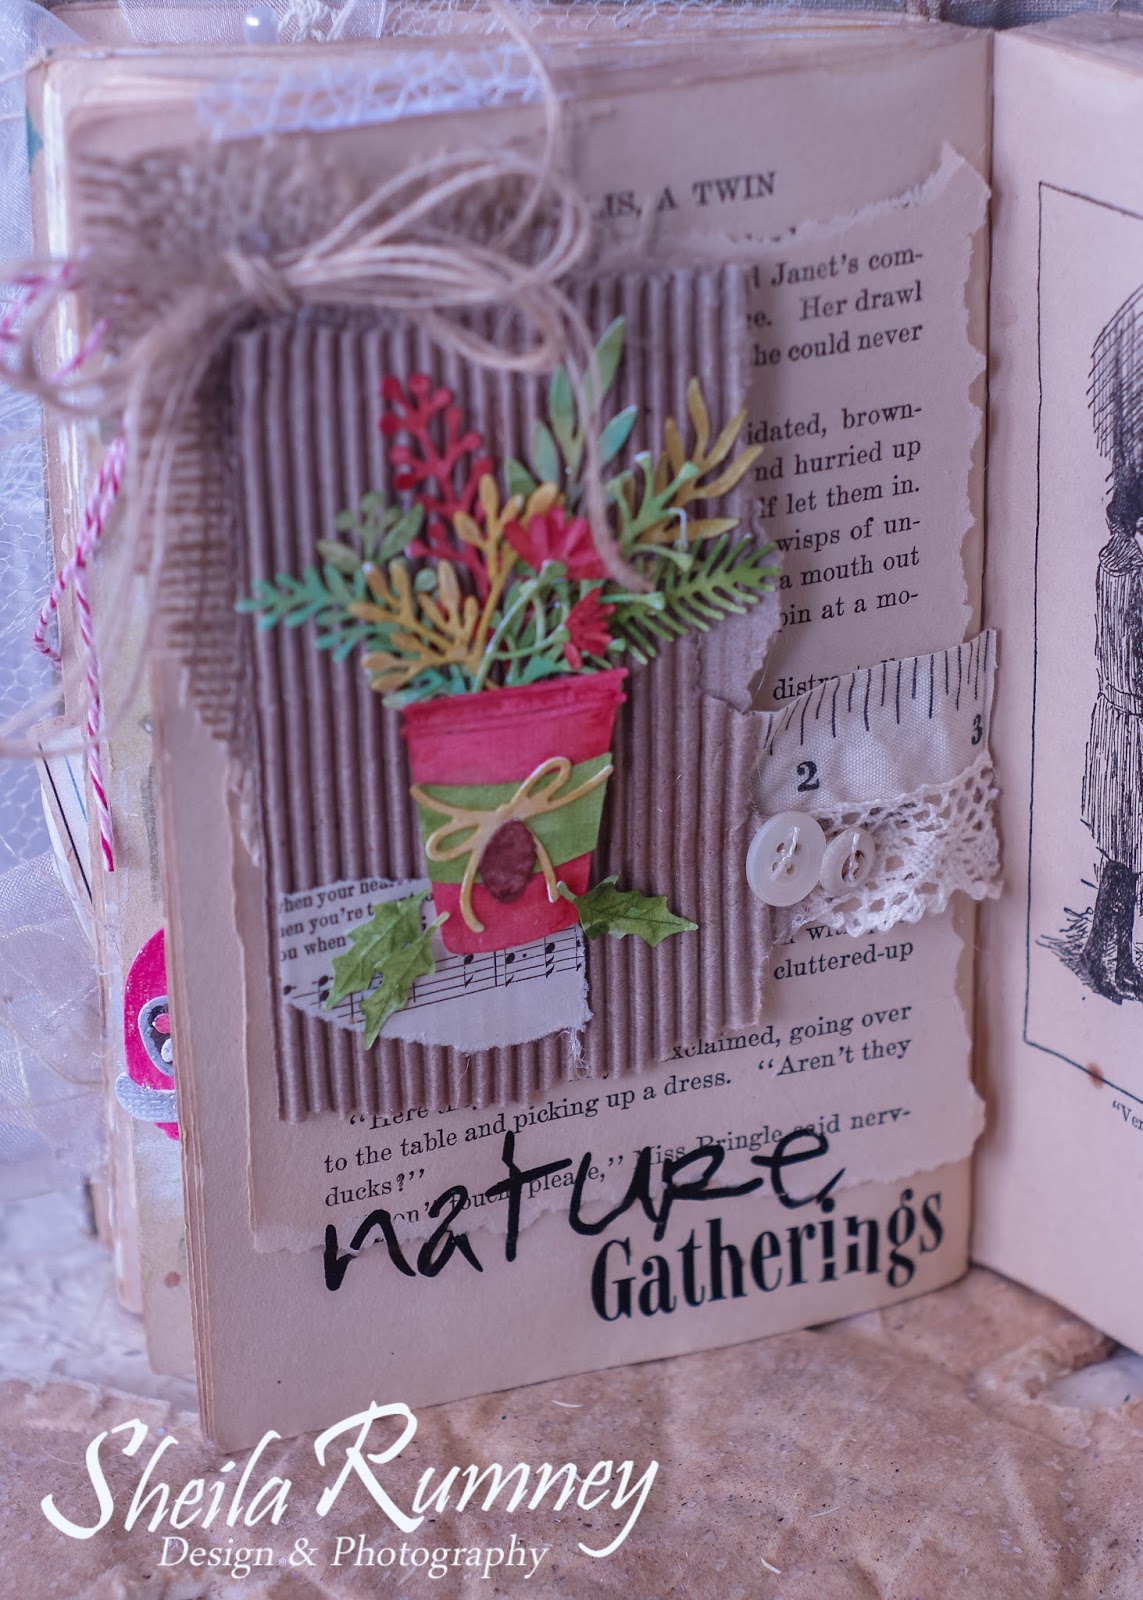
I have always been a fan of die cuts for all my paper crafting projects. I have electronic cutters but nothing is more satisfying and fun as creating with a steel die like those CottageCutz offers.
 
I can always find just what I'm needing in their expansive store and when I want to occasionally go more formal, they have lots to choose from in that style too. I am having a great time being on the Design Team as their video artist. It's been an honor and a creative journey that I will always treasure.
 
Here are a few of my favorite CottageCutz cards that I have designed.


Tuesday, December 05, 2017

As Autumn is fast approaching the holidays, my heart turn towards all the gatherings with family and friends.  I wanted to capture this in my art journal.
I die cut the Cottage Cutz Christmas Floral.  
I used watercolors to color in the die cuts.  For the small pieces of the greenery, it helped to use my paper piercer to hold the die cut in place as I painted it.
I pop doted the container on the cardboard and assembled then rest of the floral arrangement.  I added ribbons, twill, lace and buttons to complete.  

Wishing you a creative day, dear friends.

Sheila


Monday, December 04, 2017

Santa at the Window


Hi, CottageCutz friends!  Lois here with a Christmas card today.  It's hard to believe that it's already December.  If you haven't made all your Christmas cards yet, you best get cracking!   CottageCutz has lots of fun Christmas dies in their store.  Be sure to take a look!  My card for today uses two coordinating dies, Window with Shutters and Window Christmas Friends.


To start my card I cut cardstock and patterned paper as follows:

Black - 8 1/2" x 5 1/2", scored at 4 1/4"
White - 4" x 5 1/4"
Patterned paper - 3" x 4 1/2"


One of my favorite embossing techniques is to ink up the embossing folder before placing the cardstock inside.  This Sizzix Bricked folder always works so well with this technique.  I inked it up with gray ink, inserted the white cardstock, and ran it through my Cuttlebug.  When you use a dye-based ink (such as Memento), the folder rinses clean under the faucet.


Next I die-cut the pieces from the coordinating dies, placing them on my sticky board to keep the small pieces from getting lost.


Using ink or markers, I added some texture to various die-cut pieces.


I wanted a window in my brick wall, so I laid the die-cut window in the center of the panel and drew inside the panes.  Then, using an Exacto knife, I cut the opening just outside the lines that I had drawn.


This photo shows the opening.


I placed some Scor-Tape around the perimeter of the window and cut a piece of acetate slightly larger than the opening . . .


. . . and, removing the protective paper from the Scor-Tape, I carefully placed the acetate over the opening.


I then glued the patterned paper in the center of the black card base.


I decorated the front of the card, gluing down the window frame and cornice and adhering the shutters and window box with foam pop dots.  After gluing the three flowers to the garland, I pierced the centers and added a yellow mini brad to the center of each.  I then glued the whole garland to the window box.


Before attaching the front of the card to the base, I had to construct Santa.  I used the illustration on the front of the packaging as a guide.  His head is attached with foam pop dots, which made it easy to place him on the front -- leaving his arm not glued down.  I then slipped the tree (on which I had applied some liquid glue) under his arm and pressed it down to hold it firm.  I had lined him up so that he would show through the window.


Because I had used pop dots on Santa's head, I needed to use thicker pop dots on the brick card front so that there was a bit of room between Santa and the window sheet.


I attached the brick card front so that Santa and the tree showed through the window -- and I was finished.


Be sure to check out all the wonderful Christmas dies on the CottageCutz website.  Dies used on this card are:

http://www.scrappingcottage.com/cottagecutzwindowwithshutters.aspx


http://www.scrappingcottage.com/cottagecutzwindowchristmasfriends.aspx


Sunday, December 03, 2017

Holly Night


Hi!

It' s Anja again with the Sunday post. December is here and the lights are already up all around our city. I still have a lot of work to do before Christmas. I have to buy and make some more gifts and I have to make some more Christmas cards. Every year I try to make some with Nativity motive. This year I'm using the new Cottage Cutz Away in a Manger die for my Nativity cards.


For this card I used:
 - Cottage Cutz dies (Away in a Manger),
- Distress Inks (Black Soot, Chipped Sapphire, Seedless Preserves, Faded Jeans, Stormy Sky, Broken China),
- white card base (10,5x15 cm),
- white card stock for background (10x14,5c, and 9,5x14 cm) and die cuts,
- white pen,
- Wink of Stella Glitter Brush pen,
- paper glue.

First I made the background. I colored the edges of the bigger rectangle with black Distress Ink. I only colored around the edges, because the middle of the paper wont be seen.


Then I used Distress Inks to make a night sky. I started in the middle with Broken China and then went to the edges with darker shades. I colored around the edges with black Distress Ink. Then I spritzed it with water drops.


I cut the silhouette of the Holly Family and colored it with black.


Afterward I put some glitter all over the silhouette to give it a little more interest.


I glued the background on the card base and this time I used white pen to make a few stars onto the night sky.


On top of the background I glued the silhouette. And that is my finished card.


Have a nice Sunday and a pleasent week ahead. 

Anja Z.


Cottage Cutz products I used:


Saturday, December 02, 2017

Joy Nativity in a Z-Fold Card

Hello Scrapping Cottage friends! Thanks for taking the time to stop and visit today. It's Mary Marsh here bringing you the Saturday edition of the Blog. Hope you were able to jump in on some of the huge savings with our Black Friday sale that was held on the online store.

Today, I am back to Christmas cards. The time is getting shorter and I need to finish up my cards for this year. That is my plan for this weekend. For this post, I decided to make a Z-Fold card and feature the Joy Nativity and Angel Trio dies. So lets get started with some details on this card.

Step 1: this week I started my card with the fancy fold I wanted to use. I like the Z-Fold and thought it would work well with the dies I wanted to showcase. This fold makes a very nice card presentation and is not difficult at all to make.

Dark Brown Card Base: 5 1/2" x 8 1/2"
Step 2: Cut 2 pieces of patterned paper- one is 3" x 5 1/2" and the other is 1 1/4" x 5 1/2".
Attach the 3" piece to the cardstock between the scored lines.
Turn the card over and line-up the 1 1/4" patterned paper to the corner of the card.
Used my bone folder and reinforced the scores that I made on the cardstock. I folded back the score line on the 1 1 /4" panel and now I have my Z-Fold card.
 
 
Step 3: I created the front panel for my card. I used one of the angels from the Angel Trio die and on the square panels I used the Stitched Square (4th largest) and the Square Set (3rd largest) dies.
Assembled the square panels and attached the angel with dimensional adhesive.
I used doubled sided tape and attached the panel to the 1 1/4" panel.
Step 4: Now onto the inside of the card. I used the Joy Nativity die for the inside panel. I also used another of the angels from the Angel Trio die.
Attached the pieces to the card inside with glue dots and Ranger Multi medium matte adhesive. After I attached the kneeling angel I decide to add a few pine sprays to ground the image. I also added some stars to this panel. I used the stars from the Snowglobe Friends die.
I also added stars to the front image panel to complete my card. That's it for me for this week. I hope I have given you an additional idea for a Christmas card. Especially if you bought these dies when the big sale was going on. See you next Saturday!
 
 
Dies I used to create card: