Friday, February 17, 2017

MINI ACCORDION PHOTO BOOK

Hello Dear Friends !!!

It's Anita here and I hope you had a great week. Spring is in the air and birds and bees are to be seen in the gardens.
CottageCutz has something new for you this season and that is the combination of stamps and dies that will surely make you happy. These are super cute and so much fun to colour.
You can check all of them here.
Valentine's Day just got over but a gift for our loved ones is what we all love making.
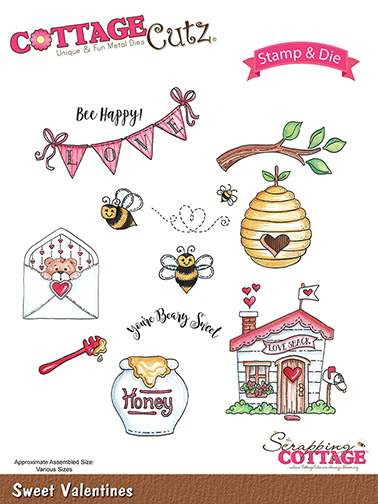
So here I have a cute mini accordion photo book featuring the CottageCutz Sweet Valentines stamp and Die set.


To make this book, follow the pictures and instructions below.
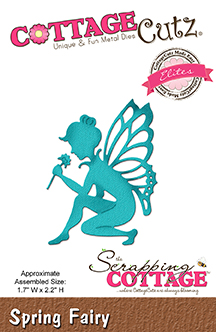
  

Stamp the image with black ink

Colour with medium of your choice. I have used Zig Brush Pens


Cut them out with coordinating dies


Cut two card stock 12" x 5" and score in mountain and valley fold at 4".


Adhere the last panel of one card stock to the first panel of the other card stock to form an accordion book.


Cut out pattern paper 4.75" x 3.75" and round of corners. Distress with aged mahogany distress ink.

Adhere these panels to the front and back of the book. Adhere Wide Stitched Rectangle frames after they also have been distressed.

Add the die cut images popping them up with 3D foam tape


Tie the book with a ribbon.


CottageCutz dies


Its so much fun to create cute projects using this stamp and die combination. To see many new dies , visit the store here.
Thank you so much for your time and comments. Happy crafting.

Tuesday, February 14, 2017

Spring fairy

Hi, Janja here!

Today I share with you another spring card.


CottageCutz dies: Spring Fairy, Wildflowers 1, Wildflowers 3, Wildflowers 4, Build An Easter Egg

Supplies:
- white card base: 5.3 x 5.3" (13,5 x 13,5 cm), folded
- purple paper: 4.4 x 4.4" (11,2 x 11,2 cm)
- white cardstock: 5.1 x 5.1" (13 x 13 cm)
- fun foam
- white cardstock

Trim purple paper and prepare cutouts with dies from white cardstock.


Fasten all cutouts. Use glue and self-adhesive foam pads.
 

Cut two squares with a paper cutter. One from a white cardstock and another from fun foam. Cut out a square 0.6" (1,5 cm) from the outer edge to get the frame. Interior dimensions are 3.9 x 3.9" (10 x 10 cm).
From purple paper cut out a thinner frame with external dimensions of 4.6 x 4.6" (11,7 x 11,7 cm).
Beautiful bow is cut out by the die - Build an Easter Egg. 


Glue frames to each other and attach a bow in the upper left corner.

Complete the card.


Thank you for coming over and see you next Tuesday.


Monday, February 13, 2017

Shaker Money Holder

Hi, Lois here with a fun project.  I'm sure we all look for creative ways to give money as a gift.  Last fall during the Splitcoaststampers Falliday Fest, one of the tutorials presented was a shaker money holder.  At the time, I didn't have a Fuse tool; so I used sticky tape.  I received a Fuse tool for Christmas, so I'm trying it again -- this time using one of the new CottageCutz stamp/die sets featuring Ben and Chloe.


Supplies used on this project are:

Plastic page protector
Sequins (black, gold, white)
Ribbon
We R Memory Keepers Fuse Tool  (if you don't have one, sticky tape will work)
CottageCutz dies - Bumblebee Chloe, Sweet Valentines
White and Yellow cardstock
Scor-tape and foam adhesive circles
Copic markers
Wink of Stella
Xyron sticker maker

To begin my project, I cut one corner of the 8 1/2" x 11" page protector down to 6" x 7 1/2".


If you've never used a Fuse tool before, you should probably practice a little bit before attempting a project.  You need to let it warm up for about 10 minutes to achieve the proper temperature.   The tool comes with a 6 1/2" ruler/guide, but I needed to fuse the 7 1/2" side; so I used a longer metal ruler.


This made a pocket, which I folded in half, using a bone folder to make a good crease.


I opened the pocket and poured in some black, gold, and white sequins -- distributing them evenly on both sides of the crease.


Then I folded the pocket back together and fused along both short sides.


It just so happened that I had some ribbon with bumblebees on it.  I cut a piece of ribbon long enough to go around the top of the pocket and lap over slightly.  To make adhering the ribbon easier, I ran a strip of Scor-tape across the back of the ribbon.  Then I applied the ribbon around the top of the pocket, made a bow and attached it to the left-hand side of the front of the pocket.


Now it was time to finish decorating the front of the money holder.  On white cardstock I stamped, colored, and die cut Bumblebee Chloe.  I used some Wink of Stella on her wings to make them sparkle a bit.


Then I ran her through my Xyron sticker maker to make sure she had adhesive covering her entire back.


Again on white cardstock I stamped, colored and die-cut the Honey Pot, Honey Applicator and some bees from the Sweet Valentines set.


I cut a banner from a scrap piece of yellow cardstock and stamped the "Bee Happy" sentiment at the top, then attached the small die-cuts to the banner with foam adhesive circles.  I adhered the banner beneath the bow, using Scor-tape, and the Chloe "sticker" to the right side of the money holder.  All that remained was to put the money in the pocket between the front and back "shaker" sides.

This was a fun project, and I imagine I will be making many of these!  I hope you try one, too.

CottageCutz stamp/die sets used on this project are:


Sunday, February 12, 2017

Lilly of the Valley Flower

Hello everyone!

It's Donna here and I am sharing with you one of the new stamp & die combo set. I am featuring one of the new Birthday Flowers sets. This one is the Lilly of the Valley Flower - May set. This set has two stamps, the flower and the butterfly, plus it has two dies, which is for the flower and butterfly. Take a browse around on the blog, there are some very creative projects using the birthday flower stamp & die combos.

Here is my card, my card is an A2 (4 1/4 x 5 1/2)


Here is a closer look of the flower and butterfly.  I added some wink of stella clear to give the elements some shine.


I used these copics to color all the elements on the flower and butterfly.


I hope I have inspired you to get one of these beautiful birthday stamp and die combo sets!

Also, there is a design team call for CottageCutz going on right now, if you are interested, all the info is here.  This is a wonderful team to be on if you are a very open minded and creative person.

Dies Used: