Showing posts with label hello. Show all posts

Tuesday, June 04, 2019

Hello Card

Hello!  This is Sukie and today I'm sharing this CAS card for my design team day.  This card came together very quickly with a few die cuts.
The patterned paper inspired the colors and rustic tones of my standard A2 sized card.  The scraps left over from other projects worked perfectly with the patterned design.
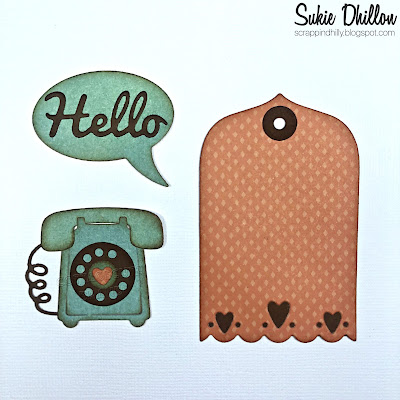
The Telephone is absolutely adorable with the coordinating speech bubble.  I used the Hello die cut for a larger sentiment.  The sweet tag is from the Love Tags Set, I added a strip of brown behind the heart cut outs.
Once I created the base of my card, the tag was offset to one side of my card.  I adhered the tag directly on top of the patterned paper.  I love the striking contrast of the colors.
The next step was to add the speech bubble with the sentiment onto my card base.  The rustic telephone was adhered in the center of the tag creating a "happy hello card."
As a finishing accent on my card, I added a small bow created with some Totally Natural Trendy Twine.
Here are the dies used on my card, available in the shop:


Monday, May 22, 2017

Hello, Fishies!

Hi, Lois here with a clean and simple card today.  Clean and simple cards are not my usual style, but every once in a while I go outside my comfort zone.  Today is one of those days.  CottageCutz has a new line of Expressions Plus dies, which are very nice, script words.  My CAS card today has one of them.


Supplies used on this card are:

Heavyweight white cardstock 8 1/2" x 5 1/2", scored at 4 1/4"
Lightweight white cardstock for masking
Scraps of orange and blue cardstock for fish and sentiment
Sponge daubers
Fine-tip glue dispenser
Black marker
Foam pop dots
Ranger Distress ink - Tumbled Glass, Salty Ocean, Spiced Marmalade

Janet, our video artist, has created a video showcasing many of the Expressions Plus word dies.

https://www.youtube.com/watch?v=QSLcthpx5W0&feature=youtu.be


I cut and scored my heavyweight white cardstock and centered the mask piece slightly below center.  This mask was actually the negative piece left from when I had cut a circle for a previous card.  I anchored it with a couple of Post-It notes and then sponged on  the Tumbled Glass ink using a sponge dauber.


Using the same sponge dauber, I added some areas of Salty Ocean ink to give some depth to the water area.  As you can see in the photo, after inking up the dauber I sponged off a bit of the color onto the Post-It note.  Better to have to add color to the circle area than to try to remove it!


Then I cut my fish and sentiment from the scraps of orange and blue cardstock.


Once again using the sponge daubers, I added some texture to the two fish around their fins and gills.


Using the fine-tip glue applicator, I carefully added glue to the back of the sentiment.


Similarly, I added glue to the back of the blue fish.  I also adhered a small foam pop-dot on the back one of the fins. 


I repeated  the process on the orange fish and adhered both of the fish and the sentiment to the card.  I added a few drops of glue to make the bubbles coming from their mouths and drew in their eyes with a black marker.


This close up shows how the fins with the foam dots stand out from the card.


Here again is my card, which I thoroughly enjoyed creating!


CottageCutz dies used on this card are;


http://www.scrappingcottage.com/search.aspx?find=double+stitched+circle

http://www.scrappingcottage.com/cottagecutzexpressionsplushellophrase.aspx

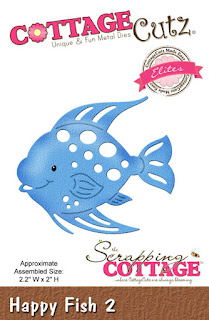
http://www.scrappingcottage.com/cottagecutzhappyfish1elites.aspx

http://www.scrappingcottage.com/cottagecutzhappyfish2elites.aspx


I would invite you to step outside your comfort zone and create a different kind of card today.


Saturday, April 23, 2016

VELLUM BLOOMS WITH ANITA KEJRIWAL


Hello friends,

Its saturday today and I hope you all are set to enjoy your weekend. Let there be lots of crafting on your table. I too have planned a super weekend with lot of projects in the queue. But first, let me share with you this delicate card adorned with vellum blooms. Vellum imparts an elegance to any flower ..so soft, so gentle. Hence, I love making these and have brought for you a card where the blooms are made with CottageCutz 3D flowers die set , both in 3D form and also as a background.

So have a look at this cool coloured card.


Instructions
 1. The card base measures 5 inches by 7 inches.                    
                                         2. Cut a mat layer in white card stock measuring 4.75 inches by 6.75 inches.                    
Adhere to the base using foam tape. 
                                       3.   Add a coloured patterned paper measuring 4.5 inches and 3.5 inches and add it to the bottom part of the mat layer.
             4.Apply Distress ink Picked Raspberry and Dusty Concord on vellum 
 5.   Cut out die cuts from CottageCutz 3D flower #7. 
                6. Keep aside four large and two medium die cuts for the main flowers and 
                                adhere the rest on the top portion of mat layer using Art Glitter glue as shown
in the picture below.


                            7.Cut two die cuts from the CottageCutz stitched Wide Rectangle Frame Set 
adhere to the front using foam tape.
       8. Now make the flowers by shaping them with embossing tool.                       
                     9.   Layer two large and one medium flower together to make one flower. 
                                10. Add pearls in the center. The leaves are again cut from green coloured vellum from the CottageCutz Plumeria die set.                         
                   11.Add the Expression Hello from the CottageCutz Expressions Hello Die 
12. Add a bow twine and pearls to complete the card.


Do visit the CottageCutz blog for all the details. There is a fabulous challenge going on there with awesome prizes. Do share your work with us. I hope you enjoyed being here. Thanks for stopping by


CottageCutz 3D flower #7

Thursday, March 17, 2016

A Sailor's Hello

Hello everyone,

It's Donna here to share with you how to make a square box card. I have lots of pictures to share with you so sit down with a cup of coffee to check out my tutorial. This card box was so much fun to make and I love these sailior dies with lots of other dies that go perfect with them. Here is my square box card.


Here is a closer look of all the elements....a list of each die I used is at the bottom of this post.


Let's get started on how I put this square box card together. To put this box together you will need a cutting board, score board, bone folde, and liquid glue or score tape.  Pictures are below the instructions for your viewing.

1. You will need your cardstock cut to 6" x 12" (I cut a 12 x 12 inch cardstock in half)

2. You will need to score your card stock on the short side at 2", 6", 7 5/8" and 11 1/2. Turn your sheet on the long side and score at 2 7/8 down to the score line of 7 5/8".

3. Take your scissors or cutting board and cut the 2", 6" and 7 5/8 score line down to the 2 7/8 score line (half way down). Cut the 11 1/2 score line half way down. So now you are ready to add your paper to the base of the square box card.

4. This is a picture of the inside of the box. You will need one piece of cardstock cut at 5 5/8" x 3 5/8"4 pieces of cardstock cut at 1 7/8" x 2 3/4 and two pieces at 3 5/8" x 2 3/4". As you can see I used several different patterns.

5. This is a picture of the outside of the box. I used the same measurements I used for the inside of the box.

6. This is your finish box. You will tape the small tab around so that the box closes up.

7.  The box is almost complete.


To put the tabs inside of the card you will need a piece of white card stock 1" x 4 5/8" scored at 1/2" and 4 1/4".  The last step is to cut all your pieces from your dies and put them together and attach them inside the box card.

The card is complete! I hope you will take a shot at making a box card, they are so much fun.