Showing posts with label Nested Scallop Rectangle Set. Show all posts

Friday, March 22, 2024

Miss Spring Bunny & Hot Air Balloon

Hello, welcome back friends!

Kris here to share some Easter inspiration with you!

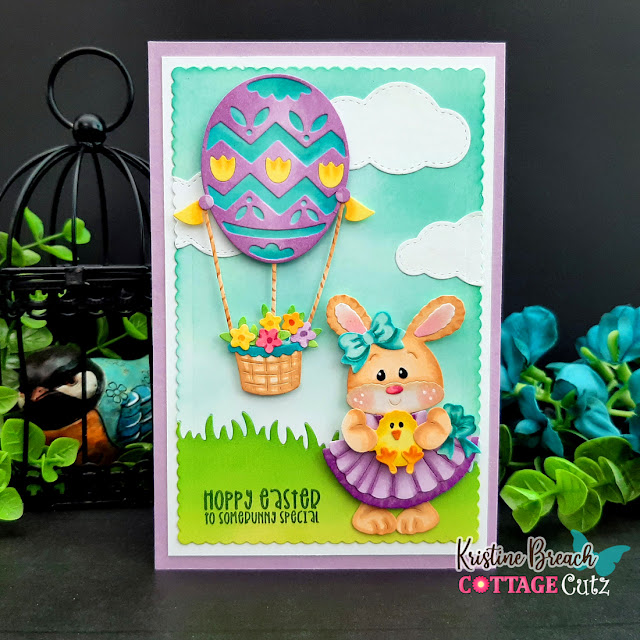
This Easter card is cute and SO EASY to make!  It features Miss Spring Bunny and the Spring Hot Air Balloon dies


I also want to point out that you have until 9 PM (Pacific) TONIGHT to take advantage of this:


DESIGN STEPS:

I die cut Miss Spring Bunny and the Spring Hot Air Balloon from white cardstock and colored with Copics, then assembled.

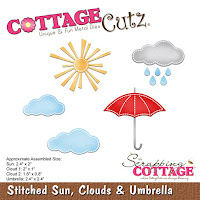
I also die cut the clouds from the Stitched Sun, Clouds and Umbrella die

(aren't these adorable?!)

I decided to make this a 4" x 6" card to get the height needed for the hot air balloon.  I cut a piece of white cardstock at 4 x 6" then I used the largest Scalloped Rectangle die and used the "die extension" method to make it fit within my 4 x 6" with an equal border all around.  

Next, I used one of the Grass Slimline dies to cut grass into the bottom portion of my scalloped panel.  Instead of layering my grass on top, I fit it back into the cut out section like a puzzle!  That way I have scalloped edges all around the 3 sides of my grass layer!  ☺ 


I added Distress Oxide ink to both pieces; Peacock Feathers for the top and Twisted Citron & Mowed Lawn for the Grass. 


I added my clouds and stamped a sentiment on grass, then layered onto a piece of white cardstock cut a li'l larger.  My card base is cut at 6" x 8" and scored in half at 4".  I popped my Bunny and Balloon onto front with foam tape.


Thank you so much for taking a peek today! 

HAPPY CRAFTING!!

~Kristine

Head over to Cottage Cutz and do a little shopping today!

Get Social With Cottage Cutz

Wednesday, January 24, 2024

Warm and Cozy Sandwhich Board Sign-Card

Hey crafty friends,
So glad you stopped in today!Today I am sharing here on the Cottage Cutz blog. I created this easy little sandwhich board sign/card and it features some fun dies from Cottage Cutz. Take a look.

Here is my sweet little sandwhich board sign/card.

For the base, I cut a piece of 8.5" x 11" piece of paper to 4x11. I folded it in half as the 5.5" mark. I then measured out a portion of the bottom to cut out the "legs". I marked the folded bottom open edge .75" from either side. I measured it lengthwise a half inch from the bottom.

Here is a photo collage of the measurements and the finished cut out at the bottom of the card.


I cut out a piece of paper at 3.75 x 4 and then scored it at a half inch along the 4" side. I accordion folded the piece and then attached it on the inside of the stand. This will allow the stand to open but not too far.

For my black mat, I did some dry brushing of the white ink to make it look a little like a chalboard.


Here is one final look at my cute little sandwhich board. If you wanted to use it as a card, you can use the back to put your sentiment.


Here is a closeup view of the cocoa cups. I added some stickles to the whipped cream. I also used some dimensional paint on the tops of the cookies. Also for the little faces, instead of making them like Santa and Frosty, I used regular noses instead of carrot noses. I also cut off the beard and used the other face.


Here is one more closeup look at the cute little cocoa cups and the cute little cookies.
I added all the cute embellishments onto the black, brown mats and added those to the scallop stitched mat.


Dies Used For This Project

Warm and Cozy Cocoa

Nested Scallop Rectangle


Well, that about covers it for today. Be sure to come back real soon. You will want to keep up with my crafty adventures!  Don't forget to find me on social media too! Links are below.
Until the next time, have a wonderfully crafty day!
Melinda

Friday, October 27, 2023

Watercolored Fall Tree


Happy Fall Y'all 😊


Kris here sharing some Friday inspiration with you!   My card today features the Fall Tree from the new New Fall Release!  All the individual dies from this release are still 30% OFF for a limited time and there are 15 beautiful Fall designs!

I joined Mary & Pam in the Color Challenge CC971 at SplitcoastStampers this week which is...

Pretty Peacock
Crushed Curry
Cajun Craze
The dessert option is TEXTURE.


(All dies I used are linked at the end of this post)

DESIGN STEPS:

I started with an A2 top folding card and since I was out of the Curry c.s., I used Daffodil Delight and ink blended some wild honey Distress Oxide ink to get the deeper curry color. 


For the background of my focal image I wanted to incorporate some texture so I used some thick watercolor paper and die cut the Leafy Background Slimline die and mounted it on a piece of 3-1/4" x 4-1/4" watercolor paper.  


I then turned it over and cut off the excess.


I adhered this to the middle of my card front.


Next, I die cut the Fall Tree and leaves from the Autumn Ladder from watercolor cardstock.

(I also die cut the wheelbarrow thinking I'd put it at the bottom of my card with leaves in it, but it ended up being pretty large compared to my tree, so I eliminated it.)

I die cut a piece of Mossy Meadow c.s. with one of the Hills Slimline dies and another piece I die cut with one of the Grass Slimline dies. I cut both to 3-1/4" wide and mounted the hill on top of the grass blades and adhered to card front.


I watercolored the tree and leaves with Crackling Campfire, Carved Pumpkin, Wild Honey and Vintage Photo Distress Oxide inks and set aside to dry.

Next, I created a frame from the Pretty Peacock c.s. by layering the 2nd largest Wacky Stitched Rectangle Die inside the largest Scalloped Rectangle Die and die cutting it.


I added foam strips to back of frame and adhered to card front.


I adhered my tree and leaves onto card front.

For my sentiment, I used this pretty teal watercolor Deco Foil to foil my sentiment onto the Cajun Craze cardstock.  To do this, I printed my sentiment on the Cajun c.s. using a laser printer, then added my foil on top and ran it thru my Minc (like a laminator, but made for foiling).


Here are the results up close:  
I love how it incorporated the peacock, yellow and green ☺


and done!


  I hope you are inspired to get crafty with your favorite CottageCutz dies!  

More inspiration and tutorials on our YouTube channel here. 

♡  ♡  ♡

~Kris